aescripts + aeplugins社 スクリプト製品 ライセンス認証方法
この度は株式会社フラッシュバックジャパン取扱aescripts + aeplugins社製品をご利用頂き誠にありがとうございます。ここではスクリプト製品のライセンス認証方法をご案内致します。
aescripts + aeplugins社 アカウント作成方法:Step 1
aescripts + aeplugins社のアカウント作成ページを開きます。 Webページにアクセスします。
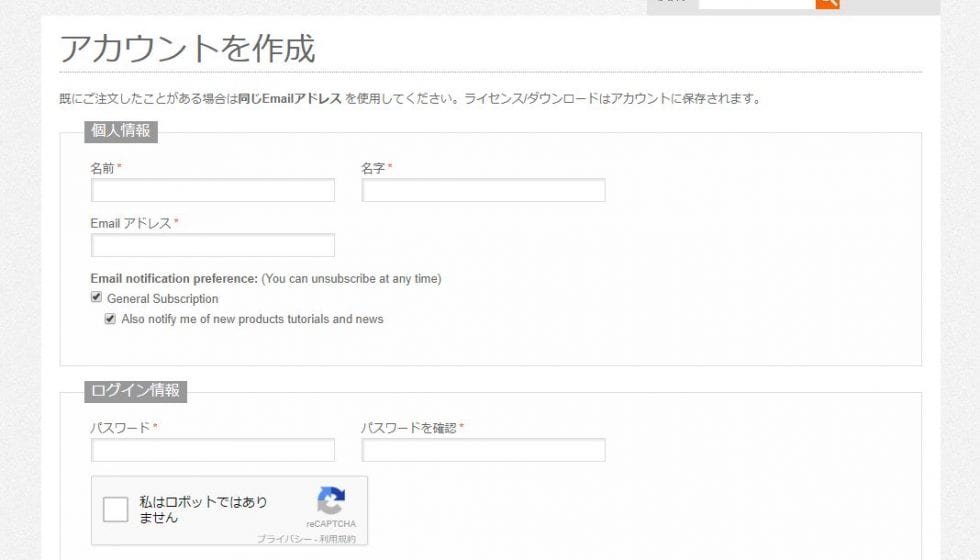
■ aescripts + aeplugins社 アカウント作成ページ
情報入力画面が表示されます。各項目の情報を半角英数で入力し(「*」付きの情報は必須)、【SUBMIT】をクリックします。
※本フォームに入力した「E-mailアドレス」に、確認のメールが送付されます。
aescripts + aeplugins社 アカウント作成方法:Step 2
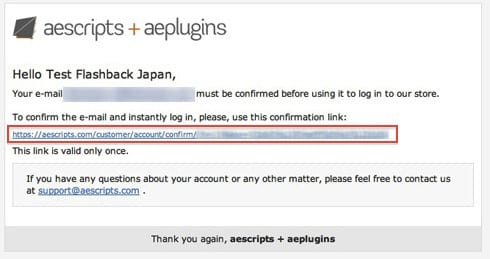
アカウント作成時に入力したメールアドレスに「Account confirmation for <<登録名>>」という件名のメールが届きます。
メール内のTo confirm the e-mail and instantly log in, please, use this confirmation link:をクリックすると ログインされた状態で、Webページが開きます。これでaescripts + aeplugins社 アカウント作成は完了です。
aescripts + aeplugins社製品 正規ライセンス取得方法:Step 1
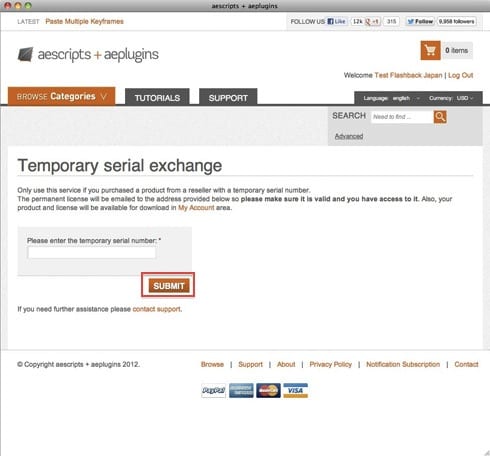
aescripts アカウントにログインした状態で、正規シリアルNo.の申請ページを開きます。
左記ページが表示されますので、Please enter the temporary serial number.欄正規ライセンス取得コードを入力してSUBMITをクリックします。
aescripts + aeplugins社製品 正規ライセンス取得方法:Step 2
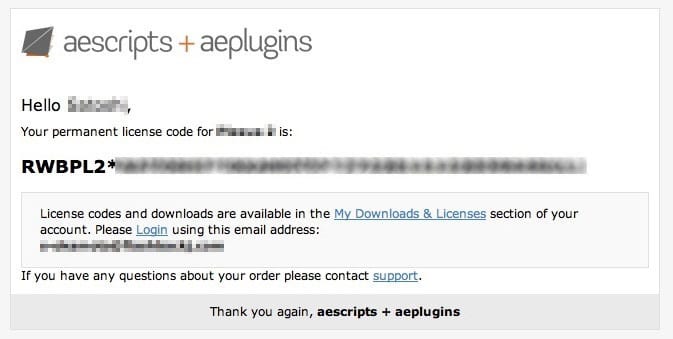
登録したメールアドレスに、、左記のメールが届きます。
差出人:aescripts + aeplugins <support@aescripts.com>
件名:Permanent license code for (製品名)
正規ライセンスの形式は以下のようになります。
例:RWBPL2*ユーザー名*112233440SUL1
引き続き、デモ版からのライセンス認証を行います。
Floating版をご購入のお客様は、取得した正規ライセンスを利用してライセンスサーバーの設定を行います。ライセンスサーバーの設定方法につきましては、下記リンクをご参照ください。
aescripts + aeplugins社 スクリプト製品 ライセンス認証方法

After Effects の「ウィンドウ」メニューからスクリプトを起動すると、ライセンス認証画面が表示されます。
例:After Effects メニュー > ウィンドウ > Rubberize_It
aescripts + aeplugins社 製品正規ライセンス取得方法で取得した正規ライセンスコードを入力し、OKをクリックしたらライセンス認証は完了です。
aescripts + aeplugins社 スクリプト製品 ライセンス認証解除方法:Step 1
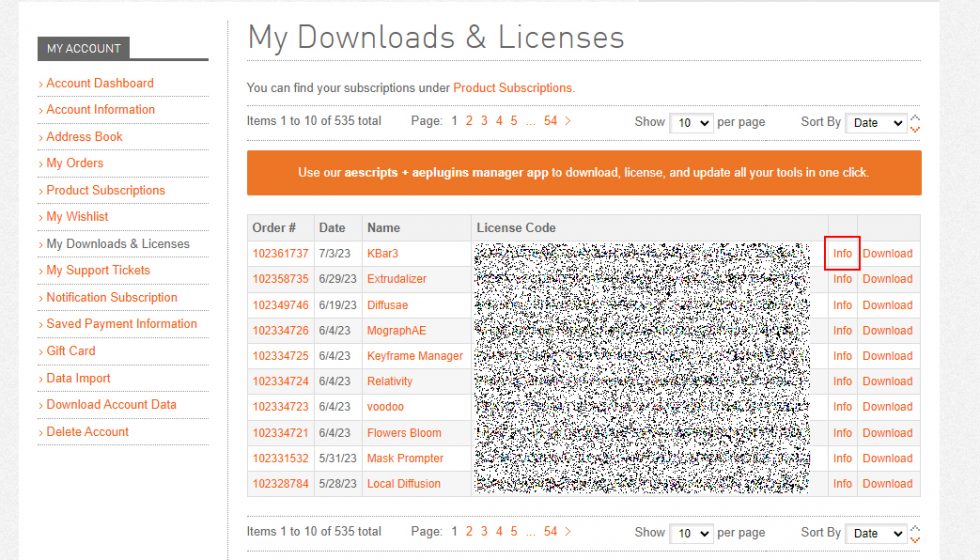
aescriptsのアカウントにログインしてMy Downloads & Licensesページを開きます。
ライセンス認証解除を行うプラグイン/スクリプトの右側にある Info をクリックします。
aescripts + aeplugins社 スクリプト製品 ライセンス認証解除方法:Step 2
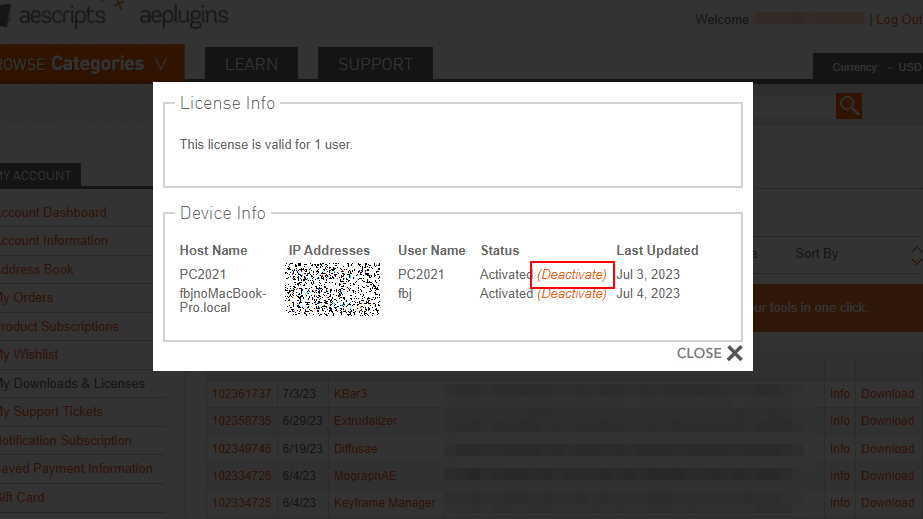
ライセンス情報が表示されます。
ライセンス認証解除行うコンピューターで(Deactivate)をクリックします。
aescripts + aeplugins社 スクリプト製品 ライセンス認証解除方法:Step 3
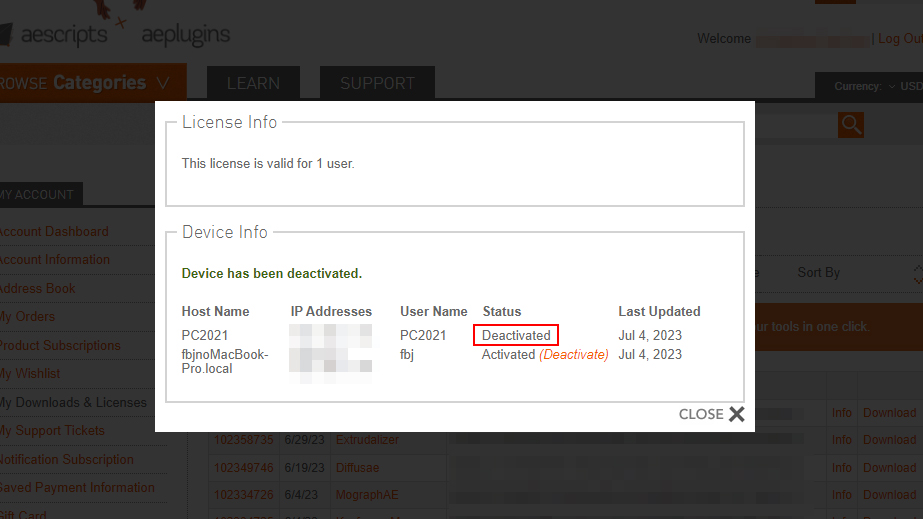
Deactivated(ライセンス認証解除済)と表示されたらライセンス認証解除は完了です。
Auto Crop 3ライセンス認証方法:Step 1

After Effectsを起動し、ウィンドウ > Auto Crop.jsxbinからAuto Crop 3を起動します。Preferenceボタンをクリックします。
Auto Crop 3ライセンス認証方法:Step 2
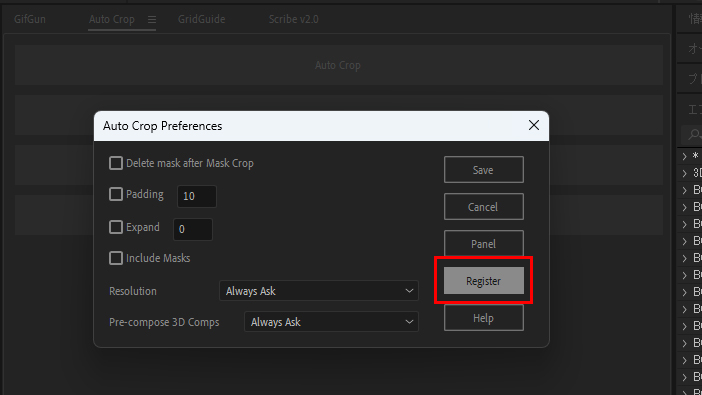
Auto Crop Preferenceが開きます。
Registerボタンをクリックします。
Auto Crop 3ライセンス認証方法:Step 3
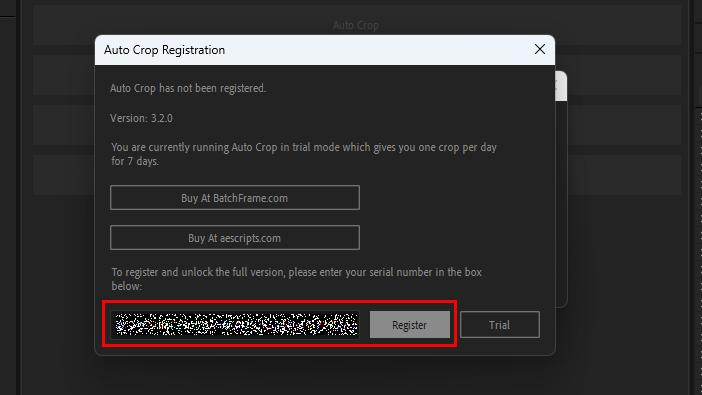
Auto Crop Registrationが開きます。
赤枠内に正規ライセンスをペーストし、Registerボタンをクリックします。
Auto Crop 3ライセンス認証方法:Step 4
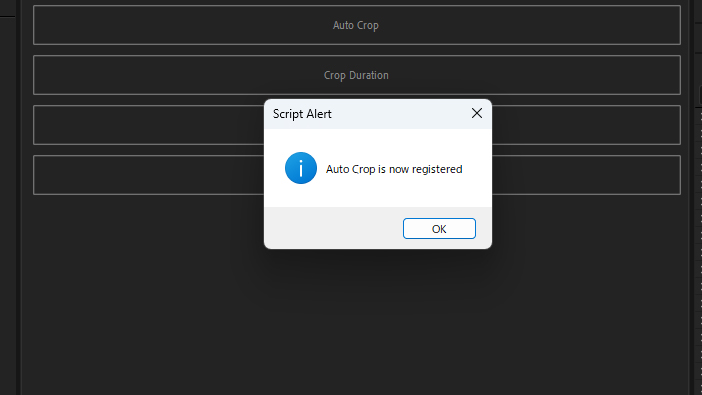
Auto Crop is now registeredと表示されたらライセンス認証は完了です。