RodyPolis LLC社 ActionVFX サブスクリプション利用開始方法
この度は株式会社フラッシュバックジャパン取扱「RodyPolis LLC社製品」をご利用頂き誠にありがとうございます。ここでは「ActionVFX」のサブスクリプション利用開始方法をご案内致します。
クリップのダウンロード
Starup/Enterprise版のチーム管理について
ActionVFX アカウント登録方法:Step 1
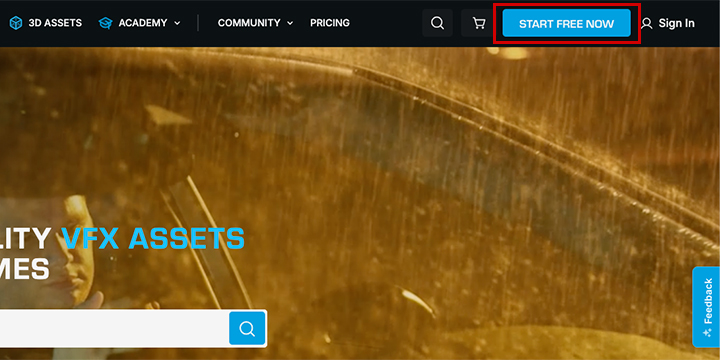
ActionVFX アカウント登録には、無償プランに登録する必要があります。
まず最初に開発元のURLにアクセスします。
画面右上の「START FREE NOW」をクリックします。
ActionVFX アカウント登録方法:Step 2
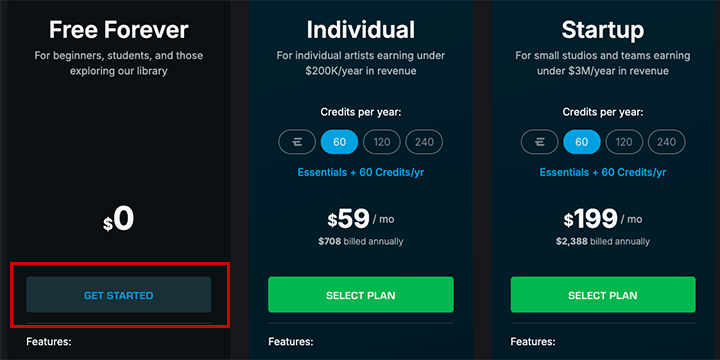
各プランの画面が表示します。
左のFree Foreverの下にある「GET STARTED」をクリックします。
ActionVFX アカウント登録方法:Step 3
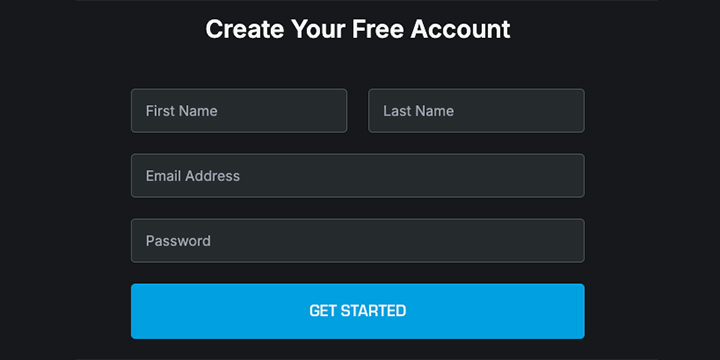
アカウント登録の画面が表示します。
以下の各項目の情報を半角英数で入力し「GET STARTED」をクリックします。
First Name:名
Last Name:姓
Email:Emailアドレス
Password:パスワード (最低6文字以上)
ActionVFX アカウント登録方法:Step 4

画面右上にアカウント情報が表示されたらアカウントが登録されました。
次に登録したEmailアドレスの確認が必要です。
ActionVFX アカウント登録方法:Step 5
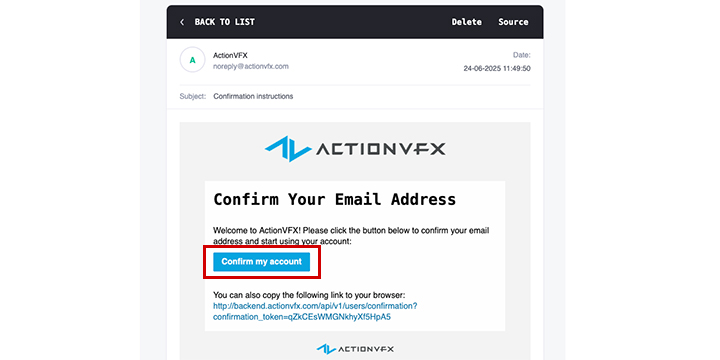
登録したEmailアドレスにActionVFXから確認メールが届きます。
Email内の「Confirm my account」をクリックします。
ActionVFX アカウント登録方法:Step 6
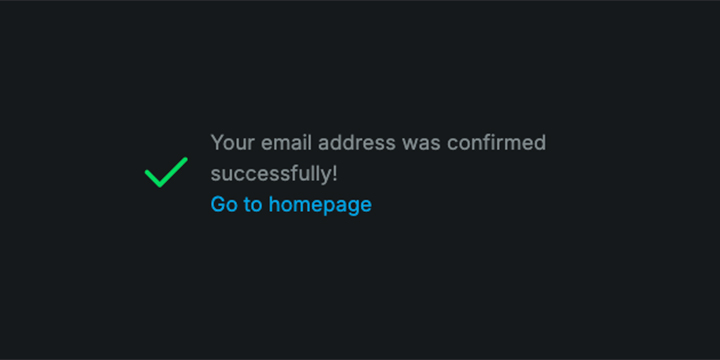
Emailの確認完了画面が表示されます。
以上でアカウント登録は完了です。
ActionVFX サブスクリプション利用開始方法:Step 1
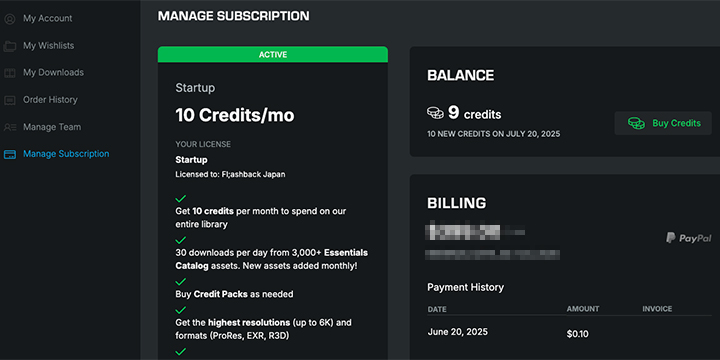
納品完了後には開発元がお客様のアカウントへサブスクリプションを付与しております。
ActionVFX アカウントの「Manage Subscription」 から登録されているサブスクリプションをご確認ください。
ActionVFX ダウンロード方法:Step 1
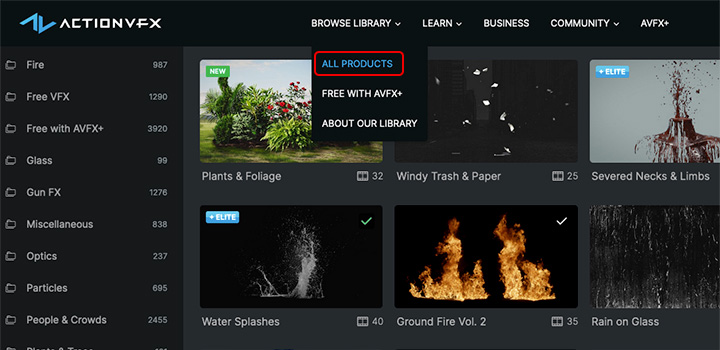
ActionVFX サイトのメニュー、BROWSE LIBRARY から ALL PRODUCTS をクリックしてライブラリを開きます。
ActionVFX ダウンロード方法:Step 2
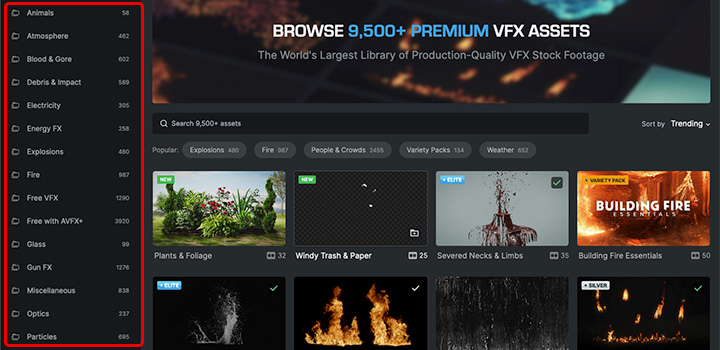
画面左のメニューからカテゴリーをブラウズして、ダウンロードしたいコレクションを検索します。または中央の検索窓にキーワードを入力して素材を検索することもできます。
ActionVFX ダウンロード方法:Step 3

ここでは例に「Ground Fire Vol.1」のクリップをダウンロードします。
ActionVFX ダウンロード方法:Step 4
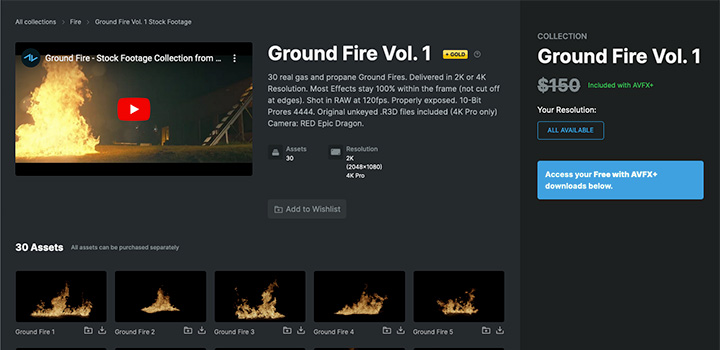
「Ground Fire Vol.1」のコレクションページが表示します。
ActionVFX ダウンロード方法:Step 5
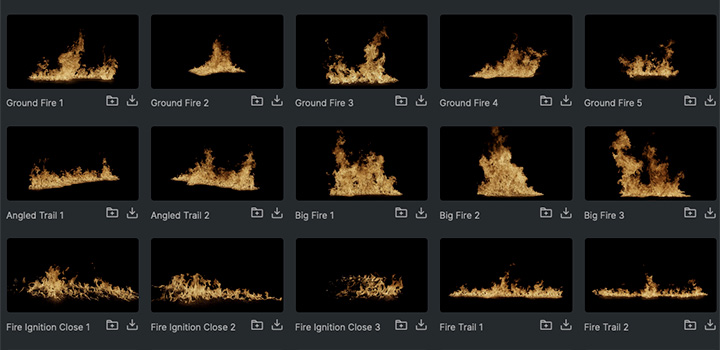
画面を下にスクロールするとコレクションに収録しているクリップが一覧で表示します。
ActionVFX ダウンロード方法:Step 6
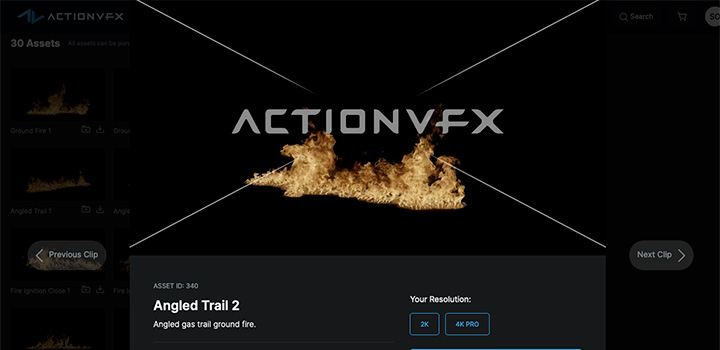
クリップをクリックするとプレビューとクリップの詳細情報が表示します。
ActionVFX ダウンロード方法:Step 7
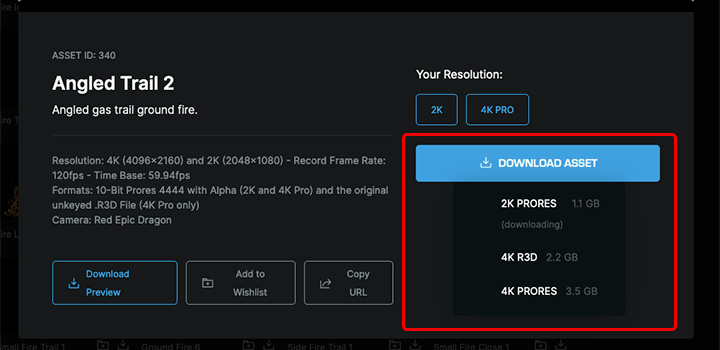
クリップをダウンロードする場合は「DOWNLOAD ASSET」をクリックします。
ダウンロード可能な解像度のオプションが表示するので選択します。
クリップのダウンロードが開始します。
ActionVFX ダウンロード方法:Step 8
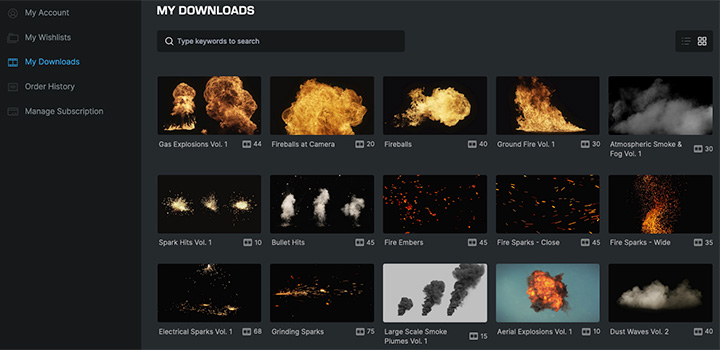
一度ダウンロードしたクリップは My Account > My Downloads から確認することができます。
ActionVFX チーム管理方法:Step 1
Startup/Enterprise版にはチーム管理機能が付属しています。チーム管理機能では管理者ユーザー以外に複数ユーザーを追加して、チームメンバーがクリップをダウンロードすることができます。
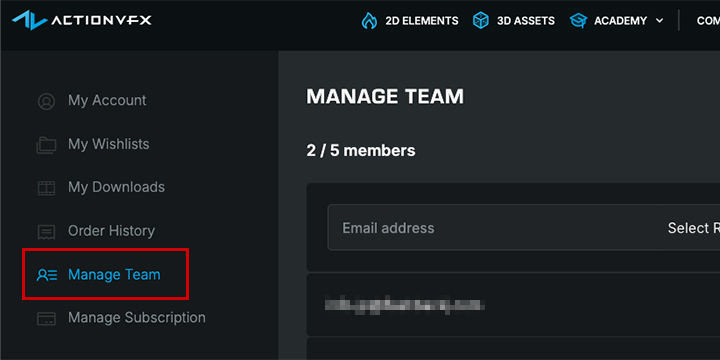
チーム管理機能ページは MY ACCOUNT > Manage Team からアクセスできます。
ActionVFX チーム管理方法:Step 2
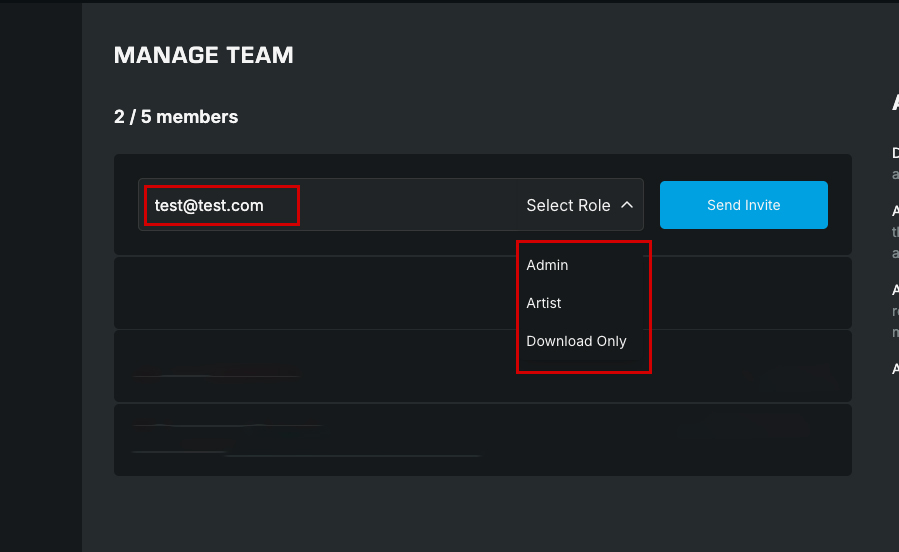
ユーザーを追加する場合は、まず最初にEmail欄にユーザーのEmailアドレスを入力します。
次に右のSelect Roleのメニューから以下のユーザータイプを選択します。
- Admin:クリップのダウンロードに加えて、チーム管理機能、サブスクリプション管理もできる管理者アカウント
- Artist:クリップのダウンロード、クレジットを使用してのクリップ購入、Wishlistへのアクセスができるアカウント
- Download Only:アカウントにあるクリップのみをダウンロードできるアカウント
- Account Owner Only (選択不可):全ての権限があるアカウントオーナー
ユーザータイプを選択したら「Send Invite」をクリックします。
ActionVFX チーム管理方法:Step 3
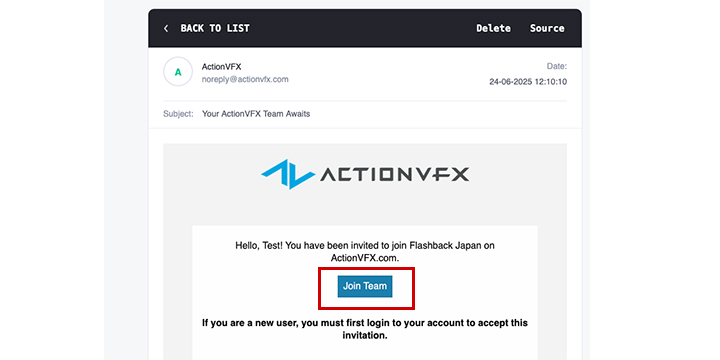
登録したユーザーのEmailアドレス宛にチームへの招待メール(件名:Your Team Awaits)が送付されます。
ユーザーが受信したメール内の「Join Team」をクリックするとチームに追加されます。
ActionVFX チーム管理方法:Step 4
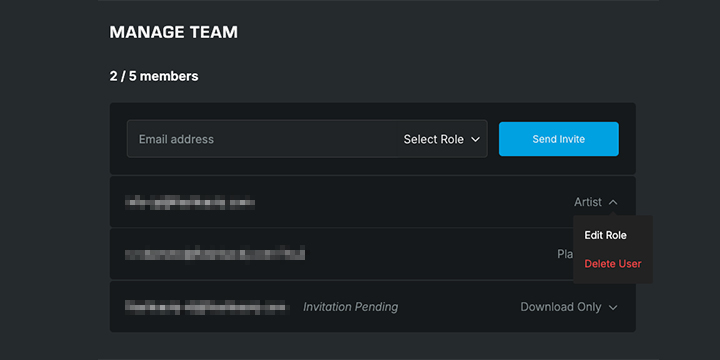
ユーザーが追加されるとTeam Memberの欄に表示します。
追加したユーザーのタイプはEdit Roleをクリックして変更することができます。
ユーザーをチームから外す場合は、Delete Userをクリックします。
上記の流れで他のユーザーを追加していきます。